This article will assist you with setting up Apple Mail, using IMAP, for your Hosted Mailbox.
REPLACE "[email protected]" with YOUR EMAIL ADDRESS


- Launch Mail. If Mail is not in your dock, Command (⌘) + Space Bar. Then type Mail in the Spotlight search. Press enter to launch the Mail application.
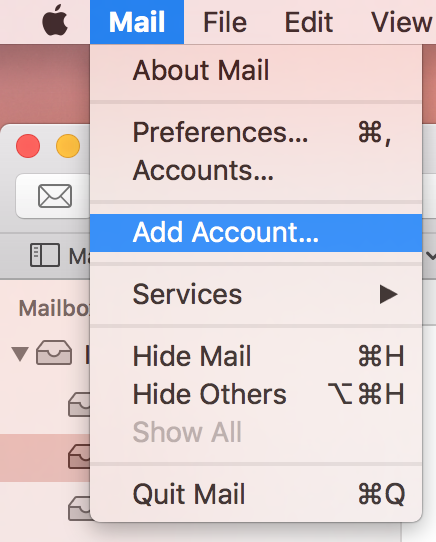
- Within Mail, click Mail on the top left. Then select Add Account
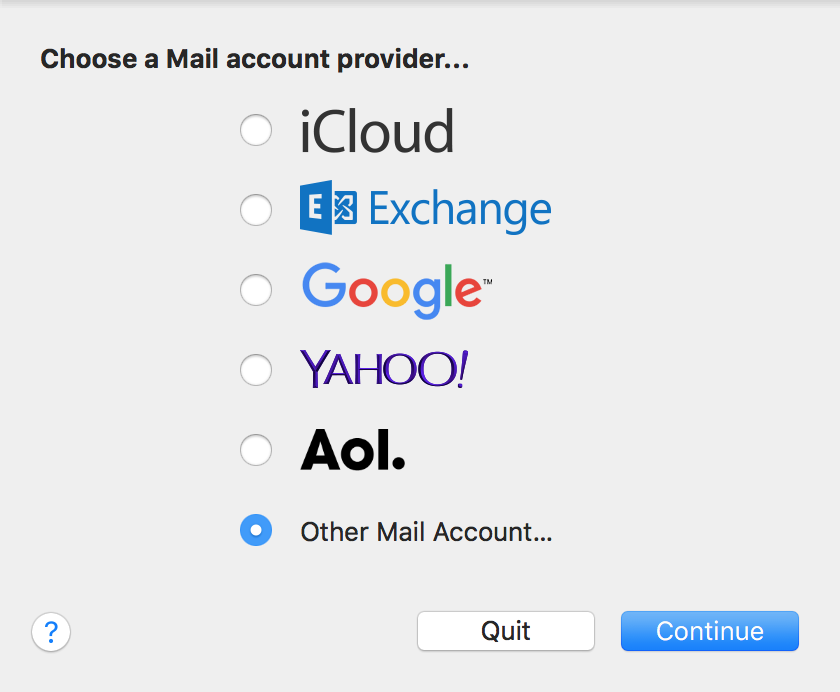
- In the pop-up window, select Other Mail Account
- In the next screen, enter the following information:
Name: Enter your first and last name
Email Address: (YOUR EMAIL ADDRESS)
Password: Enter your mailbox password - Select Sign In.
- You will see an alert which says Unable to verify account name or password. Along with this alert, you will see more fields that require additional info
Fill in the following details:
Email Address: (YOUR EMAIL ADDRESS)
User Name: (yOUR FULL EMAIL ADDRESS)
Password: Your mailbox password
Account Type: IMAP
Incoming Mail Server: secure.emailsrvr.com
Outgoing Mail Server: secure.emailsrvr.com - Important Note: Apple Mail will usually clear the User Name field after entering the Incoming and Outgoing Mail Server fields. Ensure your User Name is filled in with your email address after entering the server information and before clicking Sign in
- Click Sign In
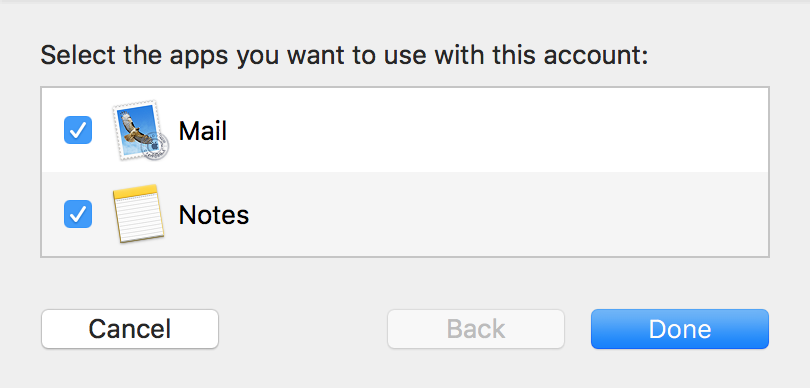
- Select the desired syncing options. You can leave the defaults on
- Click Done
Next, we will configure your Mac to sync your various IMAP folders and prevent duplicate folders from showing up. We call this Folder Mapping; below are the steps to do so
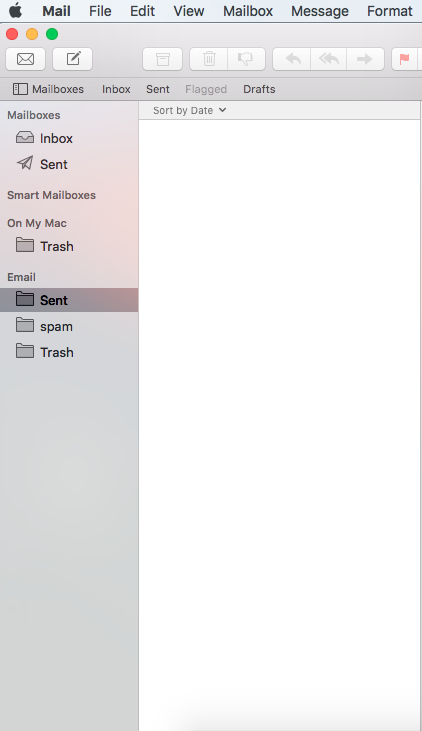
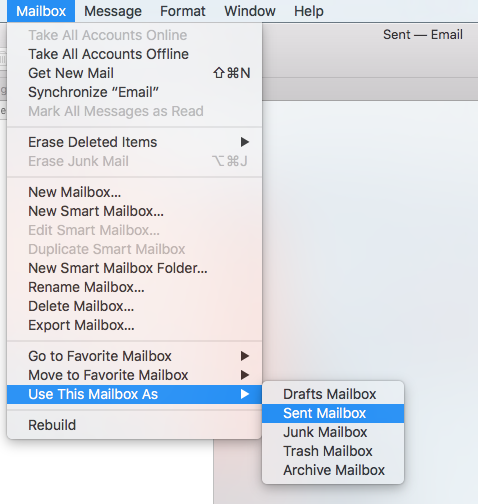
- Close all windows so that you are looking at your mailbox's Inbox
- Click on the Sent folder underneath your email account (not the Sent folder with the paper airplane)
- Once the Sent folder is selected, click on the Mailbox menu on the top
- Select Use This Mailbox As -> Sent Mailbox
- Repeat Steps 3 & 4 for Junk/Spam and Trash folders
Lastly, we will make sure our SMTP server settings are correct, as Apple Mail tends to set them up incorrectly during setup. This will prevent issues sending emails.
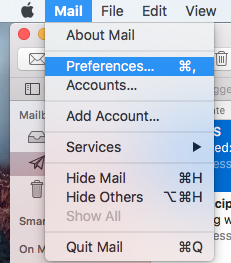


- Within Mail, click Mail on the top left. Then select Preferences
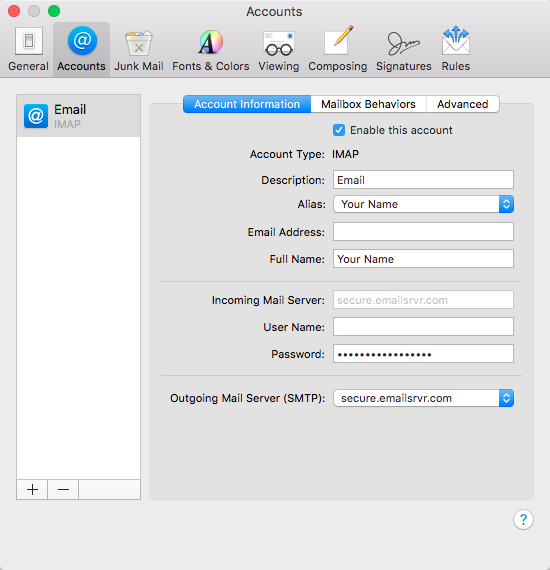
- Select the Accounts tab at the top of the window, then select your IMAP email account from the left pane
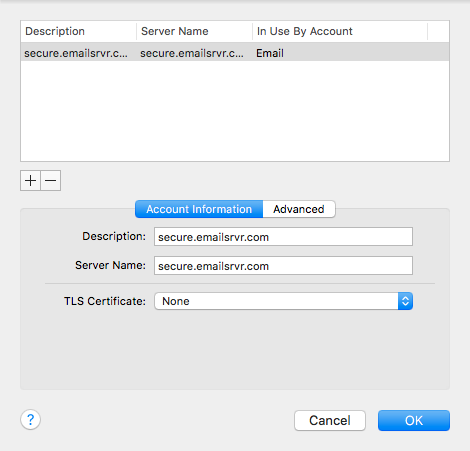
- Under Outgoing Mail Server SMTP, click on the drop-down menu, and select Edit SMTP Server List
- Under Account Information -> Server Name make sure secure.emailsrvr.com is set
- Click on the Advanced tab
- Uncheck the Automatically detect and maintain account settings checkbox
- Change the Port to 465, and Check the Use SSL checkbox
- Make sure authentication is set to Password
- Make sure that:
User Name: (YOUR FULL EMAIL ADDRESS)
Password: Your mailbox password - Click Ok
- Finally, go back to the Mail app. Your email should begin downloading shortly if it hasn't already. Please wait 15 minutes for mail to download before troubleshooting any issues