cog view-1 close-quote wench smiley-indifferent open-quote view navigation-menu-horizontal disable smiley-happy lock-unlock-1 smiley-indifferent network-browser navigation-menu close diagram-fall-down headphones-customer-support smiley-unhappy add love-it multiple-circle pencil-1 information-circle keyboard-arrow-down expand-6 floppy-disk book-star smiley-smile-1_1 copy-paste hierarchy-9 smiley-sad-1 alert-diamond attachment-1 archive smiley-sad-1 social-media-twitter time-clock-circle lock-2 synchronize-arrows-1 credit-card-1 drawer-send envelope-letter undo search rating-star list-bullets arrow-right-1 smiley-thrilled flying-insect-honey download-thick-bottom add-circle ticket-1 tags-double expand-6 print-text view-off close file-code common-file-stack arrow-up-1 button-record send-email-1 time-clock-midnight archive check-circle-1 folder-file-1 hyperlink-2 smiley-happy pencil-1 arrow-down-1 cog-1 ticket-1 remove-circle single-neutral-actions alarm-bell-1 multiple-users-1 analytics-pie-2 rating-star pencil-write move-to-top arrow-left-1 layout-module-1 shield-warning add-circle-bold single-neutral messages-bubble-square check-1 multiple-neutral-1 add-square remove-square-1 bin-paper-1 filter-1 smiley-unhappy keyboard-arrow-up envelope-letter arrow-down-2

macOS: Outlook 2011 (IMAP) - Rackspace Email Setup

This article will assist you with setting up Outlook 2011, using IMAP, for your Hosted Mailbox.
REPLACE "[email protected]" with YOUR EMAIL ADDRESS

  1. Launch Outlook, if it's not already open.
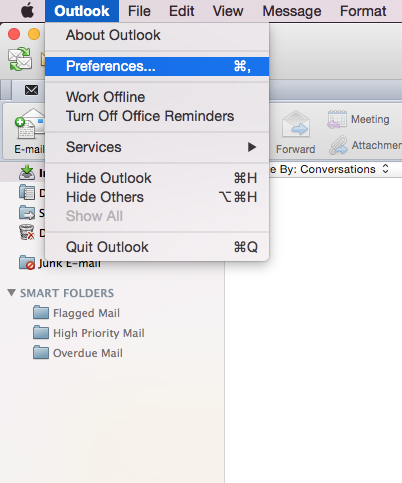
  2. From the upper menu, select Outlook -> Preferences
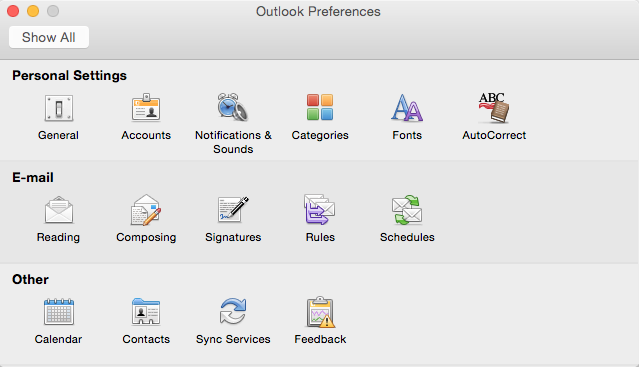
  3. In the next prompt, select Accounts
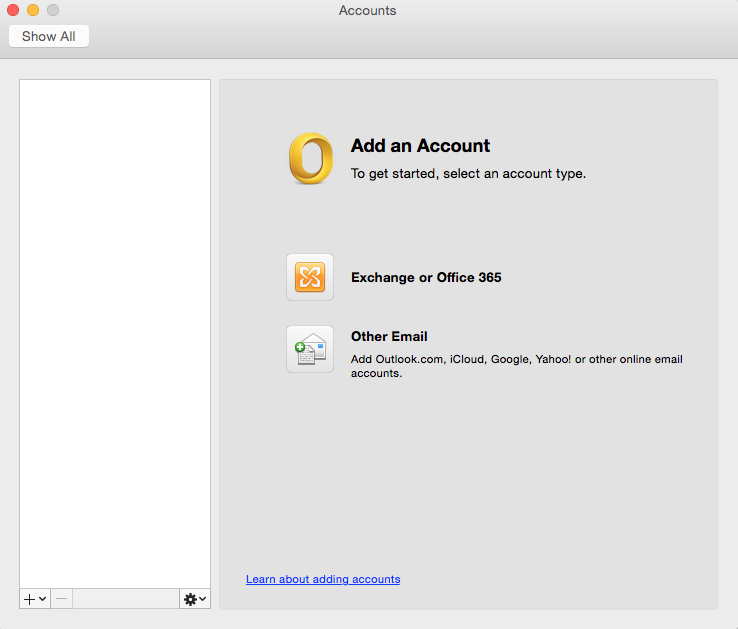
  4. Within the Accounts dialog, select Other Email
  5. The pop up dialog will require the following: 

    Email Address: [email protected] 
    Password: Enter your mailbox password. 
    User name: (YOUR EMAIL ADDRESS)

    Type: IMAP 
    Incoming Server: secure.emailsrvr.com 
    Override default port: Checked 
    Use SSL to connect (recommended): Checked 
    Incoming Server Port: 993 

    Outgoing Server: secure.emailsrvr.com 
    Override default port: Checked 
    Use SSL to connect (recommended): Checked 
    Outgoing Server Port: 465 
  6. Select Add Account
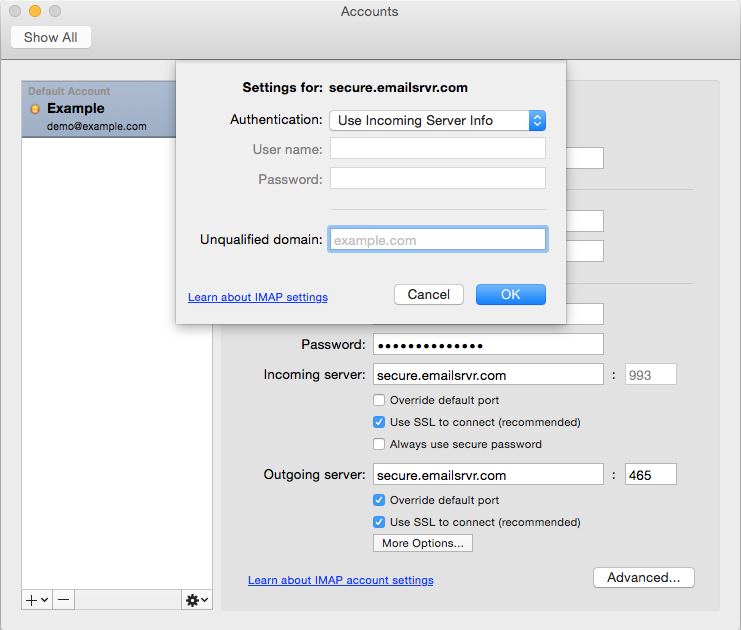
  7. Within the Accounts dialog. Select More Options under the Outgoing server section
  8. Within the dialog, ensure the following: 

    Authentication: Use Incoming Server Info 
    Unqualified Domain: Leave Blank
  9. Click OK
  10. Close the Accounts window.
  11. Click Send/Receive. Your email should begin syncing with the server. Please allow up to 15 minutes before troubleshooting.